Tutorials by K S Jewellery Designs

Tutorials by K S Jewellery Designs
(Click on the pictures for more details)

Sunday, 9 June 2013

Carnelain Six Petal Flower Pendant

Another flower pendant (surprise, surprise).  I am enjoying finding different ways to incorporate flower designs into my jewellery.  And there's more to come - watch this space!

Carnelian Sterling Silver Six Petal Flower Pendant
 

Saturday, 8 June 2013

Silver Clay Pendants


Just listed in my Etsy shop: https://www.etsy.com/uk/shop/KSJewelleryDesigns?ref=si_shop, little silver clay pendants, sweet and cute!

Tuesday, 4 June 2013

Labradorite Fleur de Lis Pendant

At my silversmithing class I have been learning how to (and how not to!) make a bezel for cabochon. It's certainly been a learning experience in how to place the flux in the right place so that the solder actually joins the bezel wire not just runs to one side of the gap and also how to use my torch correctly so I don't burn a hole in the bezel wire!  It was very satisfying when it went right but I need more practice until I feel proficient at this technique. 

I also had fun learning how to use the different sanding and polishing attachments for my husband's handheld Dremel. At one stage it felt like I took one step forward and then two steps back as I used the attachment that removed excess solder and then promptly realised that I had then accidentally added some more scratches that then need to be removed.

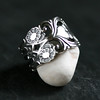
Labradorite Sterling Silver Fleur de Lis Pendant

This pendant is my version of a Fleur de Lis design.  It didn't look like this in my sketchbook however it seemed to 'grow' into this shape as I made it and added different elements.  Although I do feel quite precious about this pendant as it was my first major metalwork project that took much longer than it needed to, I have decided I can't keep everything I make and have put it up for sale in my Etsy shop: https://www.etsy.com/uk/listing/153049264/labradorite-sterling-silver-pendant?ref=shop_home_active.  Hopefully, it will find a home with someone who loves it.

Tuesday, 14 May 2013

Abstract Daisy Pendant

I bought a disc cutter last week (one of my many new tools!) and, as a result, my love affair with circles can continue in a different dimension with perfectly formed, beautifully round circles (oh, joy!).  My sketchbook is currently being filled with 'circle' designs (circles within circles... circles on circles...  circles laid on top of another shape... you get the idea!). 
 
My Abstract Daisy Pendant below uses a circle as the base for the pendant and I explored soldering shapes onto the surface.  I like the contrast in textures of the matt finish for the background and the shiny finish of the 'petals'


Pink Amethyst Sterling Silver Abstract Daisy Pendant


This pendant is now listed for sale in my Etsy shop: https://www.etsy.com/uk/listing/151150379/pink-amethyst-sterling-silver-pendant?ref=shop_home_active but unfortunately I seem to be unable to upload new products to my Folksy shop at the moment, so Etsy is currently the only place to view/buy my latest creations.  I am in the process of creating/designing my own website (ksjewellerydesigns.co.uk) so hope to get that up and running as soon as possible.

Wednesday, 8 May 2013

Amethyst Flower Textured Disc Earrings

Amethyst Flower Textured Fine Silver Disc Earrings
 
I have been making textured disc earrings from silver clay for a while now but I was so excited to now be able to add a gemstone by soldering. I would love to say I made the bezel settings around the amethyst cabochons but I can't... they are ready-made fine silver bezel cups. The gemstones were a perfect fit, how fortunate was that?!  These earrings are now listed in my Etsy shop (and soon to be in my Folksy shop but I seem to have a problem uploading the details, grrr...)
 
 
I have been learning how to create and solder my own bezel settings and am in the middle of a project at my jewellery course. Fingers crossed it will be worthy to share here on my blog when it's finished!

Tuesday, 30 April 2013

Silver Flower Earrings x 2

These two pairs of flower earrings are my version of a project in Joe Silvera's book, 'Soldering Made Simple' that I bought to help me with my soldering. The ones in the book had posts but I changed the design to these long earwires which I soldered to the back of the flowers.

Sterling Silver Flower Earrings (pointed petals)

Sterling Silver Flower Earrings (rounded petals)

Thursday, 25 April 2013

Bell Flower Earrings

Sterling Silver Bell Flower Earrings

I really enjoyed making these earrings and have been wearing them every day since. They have lots of movement as the bell flowers and dangles are not fixed to the earwires.

I cut the flowers out from sterling silver sheet and then spent ages filing, sanding and polishing and for a final polish, I put them in my tumbler. Now they are really smooth and shiny.

I shall definitely be making more of these.


Friday, 5 April 2013

Sawing, piercing and soldering - the jouney so far

Thank you so much to all those fellow jewellery makers who commented on my last blog and encouraged me to go in a new direction with my jewellery making.  Since my last blog post, I decided to take the plunge and bought a whole load of new jewellery tools to enter into the world of sawing, piercing and soldering (and I discovered that along with that comes filing, sanding, more sanding, more sanding and finally polishing!).

I have taken on everyone's advice and spent a long time watching different online tutorials, bought a wonderful book called 'Soldering Made Simple' recommended by Tracy of Cinnamon Jewellery (thanks Tracy) and also followed some guidance from my husband.  He is not necessarily 'artistically minded' but he has experience of soldering metal and he always encourages me to 'just have a go' and learn from my mistakes.  So I am!

I thought I would show you some of my attempts so far:

Petal Trio Pendant

This was my second attempt at piercing and sawing - the first attempt had too many angles and I am realising my limitations at the moment with dexterity with the saw.  Curves seem much easier to negotiate and I have only broken three saw blades so far!  I am also pleased with my first attempt at a hidden bail. Whether or not my method is the correct way to do this I'm not sure but the bail held strong and looks okay when you turn the pendant over.

Textured Circles Pendant
 
This pendant turned out completely different from my planned piece which was supposed to be a rectangular pendant with hammered circles 'sweat soldered' on to the surface.  Making this was definitely a learning experience as everything was going smoothly until I tried to solder on the middle circle and then foolishly re-heat it to move into the correct place.  Too much heat resulted in the silver circle starting to melt and the surface of the pendant starting to become textured.  I have since found out this is called 'reticulation'.  Once I realised there was no going back to my original design, I then went on and reheated the whole pendant to add more texture.  I quite like the result.  It is 'interesting' (as my husband described it!).  I might play around with texturing silver this way another time but I know I need to focus on my soldering skills at the moment.

 
Hand sawn flowers
 
These flowers took ages to create and did make me wonder why I didn't just make them out of silver clay.  The main time was spent filing and sanding however I do like the way a flat piece of boring silver can be changed with work and I also had a go with my new dapping block to shape the flowers.  I am going to turn these into earrings by adding little balls to the centres and soldering earwires to the back.  This is similar to a project in the book I mentioned above by Joe Silvera who explains things really clearly, step-by-step and I like the way he repeats important technical information during the different stages of a project.
 
So what next?.... Having had a go by myself, I have realised I still need guidance in a more one-to-one setting, so I have just enrolled onto a local silversmithing course for one morning a week for 11 weeks.  I am so excited as I think this will be a perfect way for me to learn new techniques and practise them at home ready for the following week's lesson.  I am really looking forward to it.